


Guide · Circular breathing
Circular breathing on the didgeridoo: how it really works
Aaaaah, circular breathing! This legendary and mysterious technique! When you tell people you play the didgeridoo, the next question is always: “Oh really? And can you do circular breathing?!?” So it is time to unveil the obscure mechanisms known only by the initiated, until now!
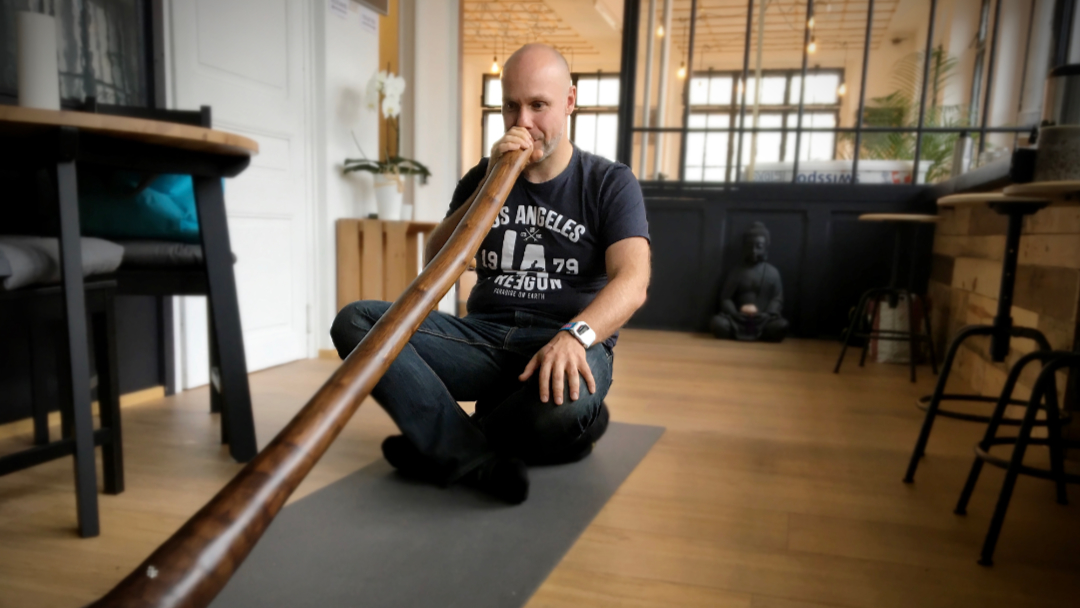
Definition
What is circular breathing?
The question everyone asks is: “How can you breathe in while breathing out at the same time? That’s impossible!” Don’t worry: yes, it simply is impossible.
Circular breathing allows musicians to play continuously without having to stop to get some air. The way it works is identical to that of the bagpipe, except that the air supply is not outside the body, but in the mouth (where the largest volume is obtained when you puff your cheeks). The musician uses this reserve to keep the drone going while breathing in: you simply push out the air held in your mouth while, at the same time, you breathe in through your nose.
And it is precisely this synchronisation that beginners usually find the hardest.
The mechanism
Cheeks or tongue?
During the breathing in phase, the musician must continue to expel air to maintain the drone. There are two main ways to push the air out, and so to keep an uninterrupted stream of air:
The cheeks
It is the best-known technique (but certainly the least played!): you push the air out with them.
The tongue
More discreet, because our tongue works in the shadows: we are rarely aware of its movements. Yet it is the tongue that does most of the work, as you are about to see.
Under MRI: what happens inside your mouth
- The player needs to breathe in: he isolates a reserve of air from his lungs. To do this, the back of the tongue presses against the soft palate.
- The in-breath happens: the air comes in through the nose and goes to the lungs. At the same time, he pushes out the reserve of air held in his mouth.
In this video, Rodrigo Viterbo plays the didgeridoo inside an MRI scanner. At the moment of the WO (which marks his in-breath), you can see the back of his tongue press against the soft palate, then move forward to drive the air out of the mouth. The full experiment is on his website.
The big mistake
So there is a real confusion between the role of the cheeks and that of the tongue. To understand how it spread, let’s take this video by Kenny G explaining circular breathing on the saxophone. You can see very clearly that his cheeks barely puff: it is his tongue that does most of the work, the cheeks are only accessories. And yet, he tells us he pushes the air with his cheeks! In 2016, when I wrote these lines, the video had already been viewed nearly 600,000 times: no wonder the misunderstanding has kept going.
Of course, I have nothing against Kenny G. This video is just a random example; there are many others.
Most of the time, it is the tongue that plays the greatest role in circular breathing!
From the largest air reserve to the smallest
To each rhythm its circular breathing
If you look at it more closely, you realize that the player has several air reserves for circular breathing, from the largest to the smallest:
The cheeks
They offer the greatest air capacity: a longer sound, for a bigger in-breath.
The back of the tongue
After the cheeks, it pushes the largest amount of air (the whole volume between the back of the mouth and the teeth). So it suits rather slow playing.
The middle of the tongue
A limited volume of air, so a shorter in-breath: the rhythm must be quite fast, or there will be a small cut in the sound.
The tip of the tongue
Only usable for fast playing, because of the very small amount of air to be expelled.
Depending on the rhythms you play, you will need one technique or another, and that is the real difficulty of circular breathing! A player quickly gets into the habit of using only one. Yet playing with a single circular breathing technique greatly limits your rhythms and variations: a back-of-the-tongue breath will almost always be played slowly, and a tip-of-the-tongue breath will lock you into short sounds and fast rhythms, or your playing will sound choppy.
The goal on the didgeridoo is to seek the maximum independence between these different options.
You can then mix all these techniques, exactly like a painter who mixes primary colours to get endless combinations. (And if you noticed that the jaw is missing, that’s on purpose: it is only a helper for the tongue.)
Before you dive in
Get ready for circular breathing
A perfectly straight drone
Don’t start by searching for your sound.
A powerful sound
It comes from your stomach. Use your lips too, and stay relaxed.
Cheeks you can control
Play your sound with your cheeks, then without your cheeks, using the corners of your mouth.
Take the time to understand it in your body and to feel it, before you even adapt it to the didgeridoo.
If your drone is not stable yet, start with my guide on how to play the didgeridoo.
Your breathing
5 reasons why you run out of breath
When you feel uncomfortable, it can be out of air, and it can also be too much air.
- You open your mouth too much. Feel a little quantity of air just in the middle of your mouth, like when you whistle very, very little.
- You push too much. Be quite dynamic with your stomach, not too much, and quite dynamic with your mouth, not too much.
- You take too little air. Close your mouth and let just a little quantity of air out: you will have time to breathe in.
- Your didgeridoo is wide open. Close the corners of your lips a little more and be a bit more dynamic with your stomach.
- You breathe with your chest. When you breathe in, your belly goes out; when you breathe out, your belly goes in.
Your body is the instrument; the didgeridoo is just the amplification.
Free course · 7 videos
Learn circular breathing in 4 steps
A little story: I remember very well the moment I understood the mechanism. It was a few weeks after I started playing. One night, lying in bed, I was trying an exercise I had been advised to do without a didgeridoo. I told myself: “Okay Gauthier, you won’t sleep until you’ve understood this.” After a few hours of practice, I had managed to breathe in through my nose while emptying my cheeks… I had understood, and the sun had just risen. Certainly one of my best sleepless nights!
Don’t worry, you won’t need to stay up all night! Most explanations of circular breathing are simply: use your cheeks and breathe in at the same time. If you learn it like that, it will be difficult. To learn it quickly, you need the right explanation, step by step: that’s why my free course goes in 4 steps, without the didgeridoo first, then with it.
Free course
Master circular breathing
- 7 videos in 4 steps
They took the step
★★★★★
“I mastered the basics of playing didgeridoo in my own living room. Thanks to your course, I was able to make that big step to circular breathing as well as master the basic sounds.”
Cyril, The art of the didgeridoo
“Circular breathing is a central theme in the course, and once we recognise that it’s of central importance in making progress, the need to grab our didge every day becomes obvious and even a PLEASURE!”
Ivan, The art of the didgeridoo
“I blocked on the circular breathing and left with it, at the end of the first 2-day course with you, as you had told me… Since then, blowing is a joy, an enchantment.”
Valérie T., workshop in Gimel-les-Cascades
Your questions
Circular breathing or continuous breathing: is it the same thing?
Yes! Both terms are right and describe the same technique. In the didgeridoo world, we often even say CB (for circular breathing), simply because it’s quicker to say.
And the reason for this name is quite easy to understand: when circular breathing flows, you really feel like a circle feeding itself. It’s very pleasant, your head switches off, your mind calms down, and that’s where the addiction begins. 🙂
What is circular breathing for?
After the drone, it’s the step that will give birth to all your playing. Circular breathing is the support of your rhythms: breathing in regularly is what gives that feeling of a rhythm moving forward.
But going further, I’d even say that circular breathing is only the starting point. Everything begins with it!
Is circular breathing hard?
Let’s start with the most important thing: demystify the technique! Circular breathing is far from a mysterious technique, and believe in yourself: you can absolutely do it.
When you think about it, circular breathing is simply:
- an air reserve in your cheeks;
- then, while you breathe in through your nose, you push this air reserve out.
So start by putting circular breathing within your reach. Tell yourself: “Thousands of people have managed circular breathing, I don’t see why I wouldn’t!” With the right exercises, I guarantee it comes quite quickly!
How long does it take to learn circular breathing?
Learning and mastering circular breathing in all its forms takes years. But the basic technique is actually quite accessible, and rapidly: with good exercises and a previously stabilized sound, most of my students understand the mechanism in 2 or 3 classes, no more. If you still have a little gap but everything is synchronised, you have it: it is just a matter of running it in. Sometimes it can take longer, it’s true (a few months), but with regular practice and the right exercises, it ends up happening!
I’ve been trying for weeks and it’s not coming…
Often, when it doesn’t work, it’s because you skipped a step. Go back to the previous step and practise it again, even if it takes several days. When it feels smooth enough, move on to the next one.
And don’t listen to those who tell you they spent a year on it without ever succeeding. Most of the time, they gave up quickly, or they had the wrong exercises. As for me, I have hundreds of students (thousands? I’ve stopped counting!) who have managed circular breathing: so believe in yourself, you’ll get there!
Can you circular breathe without a didgeridoo?
Yes. My way of teaching is to practise circular breathing without the didgeridoo first, then with it: it is the first of the four steps of my free course.
Does the straw and glass of water exercise help?
I have met a few people it helped. But water in a glass has very little resistance: with a tiny bit of air, you will see bubbles appear, whereas in a didgeridoo you have to send much more than a tiny bit of air. So it is an exercise I don’t particularly recommend, but give it a try anyway: you never know, it might trigger a click!
Does my didgeridoo make a difference?
Yes, it can. If the diameter at the beginning of your didgeridoo (without the mouthpiece) is very open, around 45 or 50 mm, it will ask you for more air and send you less back pressure. In return, the sound is much softer, and there’s room for the overtones (most of my didgeridoos are like that!).
But let’s admit it: when you’re starting out, it can be tricky.
If that’s your case, pinch the corners of your lips a little more. And don’t forget one essential thing: your body is the instrument. The didgeridoo is just the amplifier, you’re in control!
Do I need circular breathing to start?
It is better to start with the drone. Wanting circular breathing at all costs is one of the five mistakes most beginners make. Start with a very stable, straight sound, and learn to inflate and deflate your cheeks. In parallel, you can work on the circular breathing mechanism without the didgeridoo, then apply it to your instrument.
How do I play rhythms on the didgeridoo?
Circular breathing is the skeleton of your rhythm. Most of the time, we play sounds and breathe afterwards, as when we speak: on the didgeridoo, it is a mistake. Just breathe every time, regularly: a sound, a breath, a sound, a breath. That decides how fast or how slow you are going to be. See my lesson on your first rhythms
Do other instruments use circular breathing?
Yes! It’s almost always linked to the didgeridoo, but many traditional instruments use it too: the zurna, an oboe from the Middle East and Eastern Europe, the launeddas from Sardinia, the double flute from Rajasthan, or the Armenian duduk, with its melancholic sound. Personally, I have a soft spot for the duduk played by Levon Minassian.
I introduce five of them in this article.
Going further
- Lesson 3: before circular breathing
- Lesson 4: the 4 steps
- Your sound and pressure
- Your first rhythms
- 5 wind instruments using circular breathing
The other guides

Choose a didgeridoo
Follow the guide, I have cleared the path for you.
Getting started
Start off on the right foot!
Which note should you choose?
Three big families of notes, each with its own character.
Good luck!
Any musician blowing into an instrument can acquire circular breathing very quickly and thus expand to new horizons.