



The first time I heard overtone singing, it was a real shock. The same kind of shock that the unusual sound of the didgeridoo can cause. Either you’re hooked right away or you move on…
I discovered these sounds on a CD of Tibetan chanting. For 10 years, on my own, I tried to reproduce what I had heard. I probably made 90% of the possible mistakes in this area!
So here I’m offering you a few good reasons to take up overtone singing and the steps to produce your first harmonics without having to fumble around for years. ?
1. What is overtone singing?
Simply put, it’s producing two sounds at the same time with your mouth.
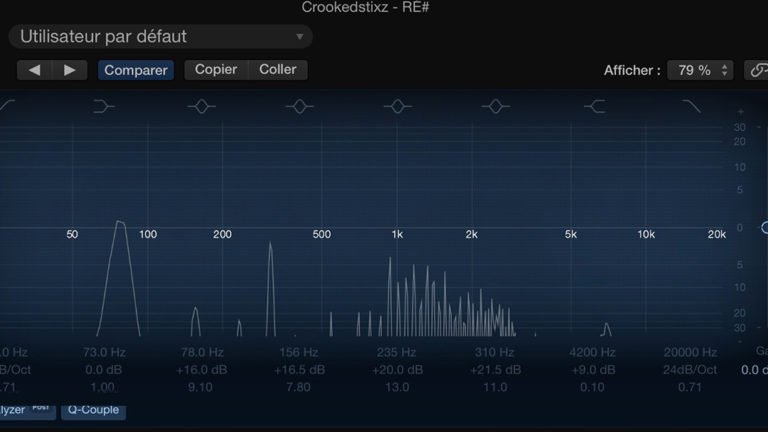
To be more precise, it’s making a low drone with your voice and accentuating one of the high harmonics of that sound. To the ear, you hear a flute-like or whistling sound that “dances” above the drone.
Here are two examples:
– A use of overtone singing for a “meditative” practice, as it has widely been used in the West since the 60s:
David Hykes – Rainbow Voice (from 1’20 you can hear the harmonics really clearly)
A contemporary Mongolian song – based on traditional practices:
Oirodiin Uria – Altai Khairkhan
To understand how it works, you need to keep in mind that any musical sound, including vocalizing, is made up of a fundamental sound – its note – and harmonics – the frequency of its note multiplied by 2, 3, 4, etc.
Our ear perceives only one sound. But in fact it is rich with all its harmonics.
The aim of overtone singing is then to select one of these harmonics and accentuate it to make it audible. Exactly the same principle as with the didgeridoo!
2. What do you gain from learning overtone singing?
As in many traditional practices, overtone singing was used to imitate nature and to connect with its rhythms and elements. It is found all around the world, and particularly in Mongolia.
Today, the uses of this singing have evolved, in Mongolia as in the West.
So here are a few good reasons to get started with overtone singing:
For meditation
It’s a kind of singing that requires concentration and is fascinating to hear – you can sit for hours (OK, I’m exaggerating a bit here!) listening to your own harmonics.
For healing
The very subtle sounds produced by the voice touch the most sensitive dimensions of our body and mind – it’s the typical sound of healing through the voice!
For connecting with the invisible
Overtone singing is used in shamanic practices because it opens our channels of subtle perception.
Because it will help you progress on the didgeridoo
Overtone singing looks cool, soft and airy…
Wrong! In fact, it’s an energetic sound! The pressure you put into your breath to produce harmonics will help you play your didgeridoo better.
The reverse is also true! Good pressure in your didgeridoo will make learning overtone singing much easier!
Find all of Gauthier’s advice on how to adjust the pressure in your didgeridoo here.
3. Four steps to produce your first harmonics
Let’s get practical! I explain these 4 steps either in writing if you keep reading, or in the video below!
In this video I present the 4 steps to produce your first harmonics
First key in overtone singing: fluidity in your voice
The first key to amplifying your harmonics is to use your voice with a lot of fluidity. In fact, it’s about changing your articulation – and therefore the shape of your mouth – in a controlled way, without any jolts.
To do this, vocalize the sequence of “vowels”:
OU – O – A – É – I
on one out-breath.
Then the reverse:
I – É – A – O – OU
on the next out-breath.
The transition from one vowel to the next should be as gradual as possible. No matter how long your breath lasts.
Second key in overtone singing: the power of your breath.
As with the didgeridoo, if you don’t put in enough pressure, you can’t bring out all the harmonic subtleties of your instrument.
So here we’re going to learn to put pressure into our breath so that our voice resonates more.
We’re going to tighten our throat slightly – the way you’d pinch a garden hose to make the water come out harder – to increase the pressure of our breath. To do this, we’ll play with nasal sounds – sounds that resonate in the nose.
Vocalize the following sequence:
On – En – Un
Then
Un – En – On
on the next out-breath.
At this stage, focus on the pressure of your breath. Your sound should be powerful and make your nose vibrate.
Let’s be honest, it’s not a very pretty sound… but you should hear a few harmonics.
Third key in overtone singing: the tip of your tongue on your palate
For some harmonics of our drone to stand out, we’ll need to slightly muffle our fundamental sound and accentuate one harmonic.
To do this, I suggest a method that uses our tongue.
Pronounce the sound L.
Notice how the tip of your tongue sticks to your palate to articulate it. It takes the shape of a hook.
Now make this L sound last for one out-breath, keeping your tongue on your palate.
Quite naturally, another sound will appear. It’s often the sound U. In any case, that’s the one we’re going to make now.
L – U
Be careful to keep the tip of your tongue on your palate for the whole length of the sound.
Last step to produce your first harmonics: put the pieces of the puzzle together.
A quick recap, you’ve learned to
- bring fluidity to the vowel sequence: OU – O – A – É – I
- give power to your voice by increasing the pressure of your breath,
- tighten your throat and point your tongue at your palate while producing the U sound
Good, now let’s put it all together!
Now do the following modulation, keeping your tongue on your palate throughout the sequence.
Keep your sound energetic, don’t let your voice gradually go soft.
L – OU – O – A – É – I
In this sequence, everything is in place for your first harmonics to appear!
A few bonus tips to go further
Most often, at first you vaguely hear one or two harmonics on certain vowels. Stop on one and try to accentuate it by increasing the pressure of your breath.
From this harmonic, move your tongue or your lips very slowly to find the previous and the next harmonic.
The vowels are a guide for shaping your mouth, but don’t try to articulate them correctly. Focus on searching for the harmonics.
Go gently. A little every day so you don’t strain your vocal cords.
Important point: tightening your throat is the opposite of opening your voice. And very often our voices are closed and held back. If you’d like to explore this opening of the voice, I have a gift for you below!
? It’s a free mini-course called “LEARN TO MEDITATE WITH YOUR VOICE“. I created it to help you:
- reclaim your voice,
- explore the healing power of sound,
- give yourself a moment of calm and recharging.
It contains 6 videos with guided exercises to learn to use your voice to re-center yourself, and a guided sound meditation. ?
I hope you enjoyed these tips on overtone singing and that they’ll make you want to explore your voice alongside the didgeridoo. Feel free to tell me – in a comment on this article – whether you heard your harmonics, or to ask me your questions!
And a big thank you to Gauthier for letting me share this magical singing with you!



Leave a Reply
You must be logged in to post a comment.